This article describes how you can take the results generated from an Az-El mask in STK and convert that over to Google Earth.
- Copy the report file PatternIntersection.rst attached to this article and place it in the following STK scenario directory: C://Program Files/AGI/STK 12/STKData/Styles/Sensor. This is a custom report style that you need in order to generate the data that you will use in Google Earth.
- Insert your facility with an Az-El Mask using Terrain Data. You may have to enable Terrain and Azimuth/Elevation Mask options in the Scenario properties > Terrain page, if these are not already enabled.
- Save the scenario. When you save the scenario, it creates an *.aem file in the scenario directory.
- Attach a sensor to the facility.
- Open the sensor's properties.
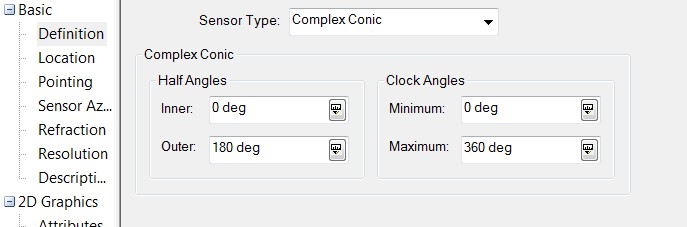
- Select the Sensor Definition page to change the Sensor Type to Complex Conic and set the following options:
Load the saved *.aem file
- Select the Sensor AzEl Mask page.
- Set the Use option to MaskFile and load the saved *.aem file from the scenario directory.
- Select the "Use Mask for Access Constraint" check box.
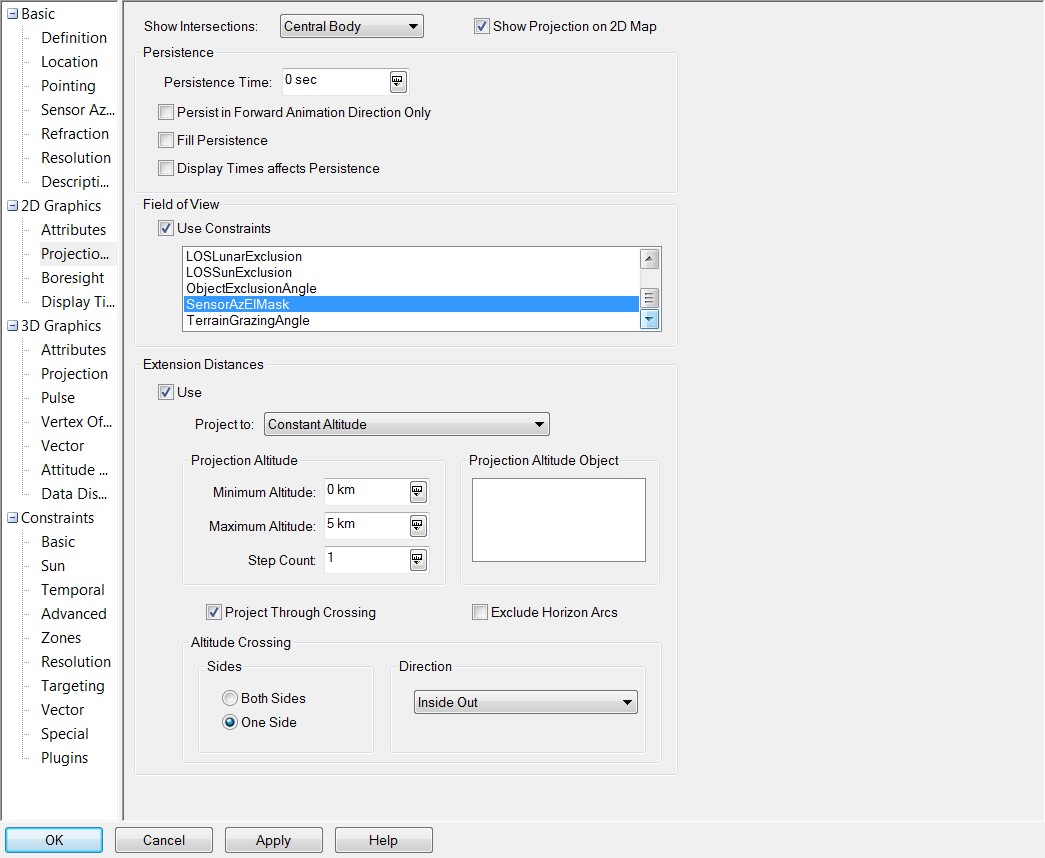
- Go to the 2D Graphics - Projection page.
- Select the "Use Constraints" check box under Field of View.
- Select SensorAzElMask.
- Select the Use check box under the Extension Distances.
- Set the Maximum Altitude to the first contour range you want in the KML.
Here are how the settings should look:
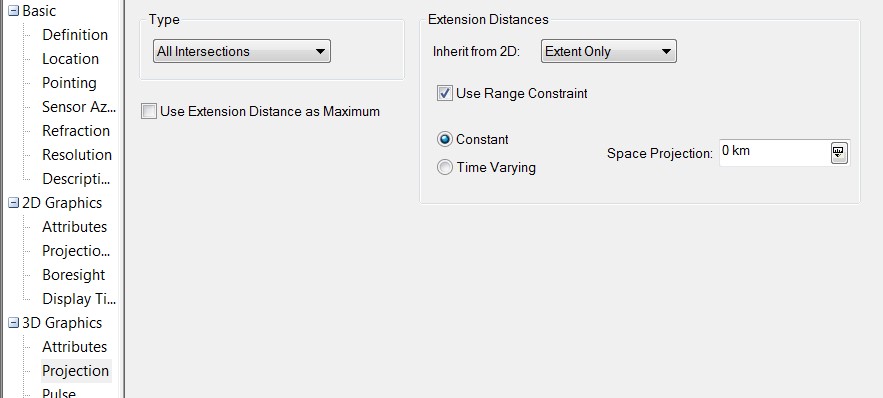
Change the 3D Graphics - Projection settings
- Still in the sensor's properties, go to the 3D Graphics - Projection page.
- Change the settings to match the ones in the picture below.
- Click Apply when finished.
Create the report
- Right-click the Sensor object and select the Report & Graph Manager.
- Under Time Properties, set the Stop time to be just 0.002 second after Start, since the Az-El mask is static data.
- Open the PatternIntersection report style that you placed in the scenario directory at the start of this article. If you don't see the report style, you may have to reopen STK.
- Generate the report.
Change the projection
- Once the report is generated, save the report as a CSV file.
- Open the Sensor properties.
- Select the 2D Graphics - Projection page.
- Set Maximum Altitude to the next contour range altitude you want.
- Repeat the process to generate and save the report.
- Repeat for as many contour range altitudes as you want.
Edit the report
Once you have saved all the reports, you need to open the reports in a text editor (like NotePad++). You'll need to add a comma after the longitude and latitude values, and then add a 0 at the end of each line. This is the altitude value you need for the KML file. Consider using the 'Find and Replace’ feature to find ‘\n’ and replace it with ‘,0\n’ to add the altitude value to each line. You can also column edit in Notepad++ by holding hold Alt + Shift and then selecting the desired lines.
Example:
-118.680,34.477,0
-118.678,34.470,0
-118.676,34.469,0
- Make a copy of the sample KML file attached and remove the contents inside the <coordinates></coordinates> tags.
- Now copy the entire <Placemark></Placemark> tags and paste them after each other for the number of contour levels you have.
- Return to each CSV report and copy and paste the lat,lon,alt values into each <coordinates></coordinates> tags section. Depending on how many contour levels you have, you many need to delete some of the coordinates sections.
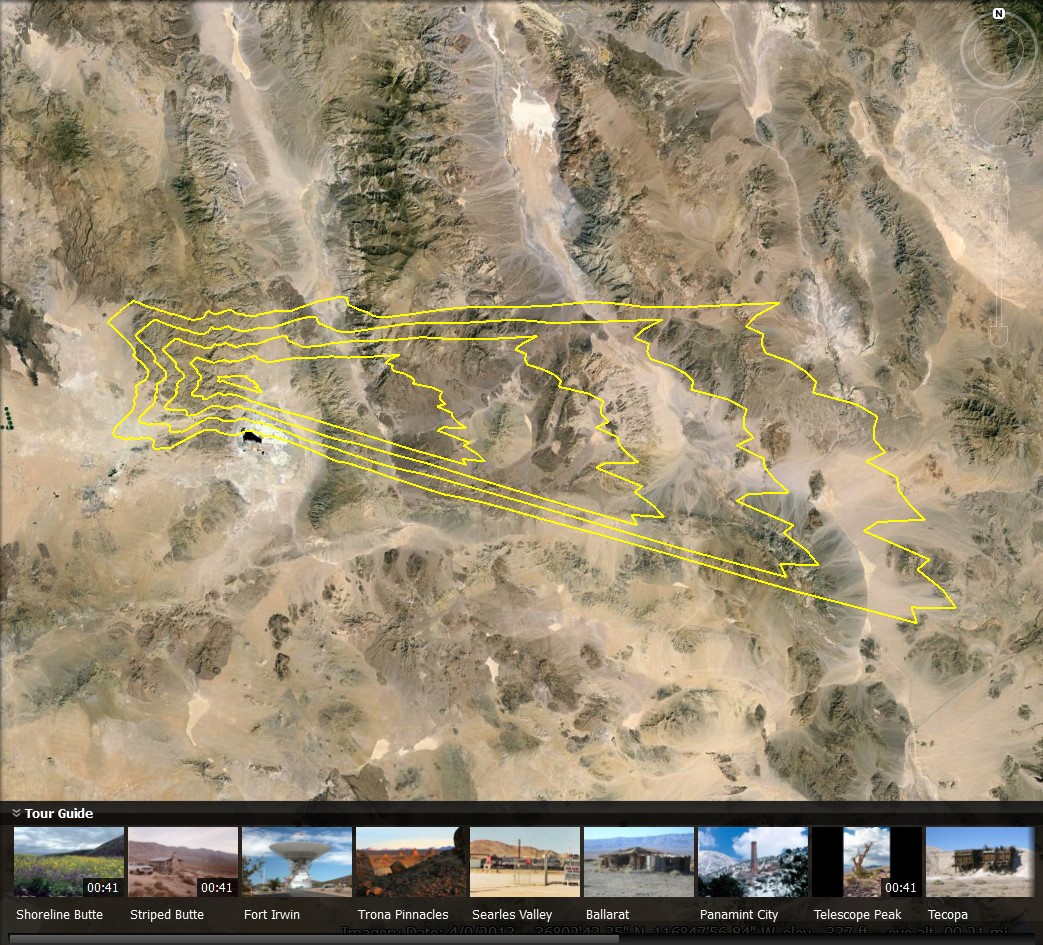
Attached is a sample file of results and what it looks like in Google Earth.