You can quickly iterate over EOIR sensor design parameters using STK Analyzer. In evaluating sensor performance, using EOIR-specific data providers can be an important output metric for your trade study. For a simple introduction to Analyzer, check out
this tutorial. Here is how to properly set up your EOIR trade study:
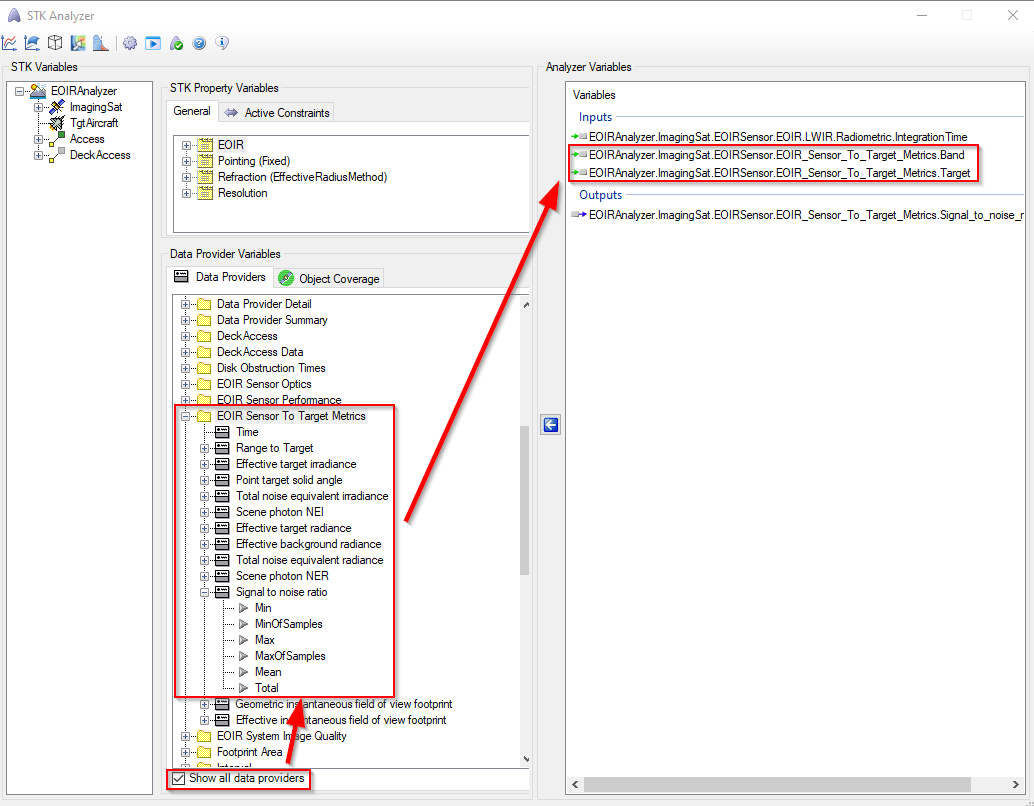
1. Open Analyzer and select your inputs and outputs. In this example, we wanted to vary our sensor Integration Time and evaluate its effect on our maximum Signal-to-Noise Ratio (SNR). Access the SNR data provider element by selecting the 'Show all data providers' check box and scroll to EOIR Sensor To Target Metrics. When you add the SNR metric, Analyzer creates two additional inputs: Band and Target.
2. Next, open up your trade study tool of choice. In the example below we used the Parametric Study tool. Set up your design variable and response normally. Before you run your trade study, you must complete the Target and Band inputs for the SNR response. Double-click in the 'Value' field next to the Target input and type in the path of your target object. It should take the general form of <STKObjectType>/<STKObjectName>. In the example, our target was Aircraft/TgtAircraft. Similarly, in the Band field, enter the desired render band from your EOIR sensor. In our case, our Band Name was 'LWIR.' The default Band Name is 'Band1.'
3. Now you can run your trade study normally by clicking the Run button at the bottom right. Happy analyzing!

