STK Excel Add-in is a set of VBA libraries, macros, forms, and toolbars that enables Microsoft Excel users to interact with STK and STK scenarios directly from Excel. The steps to install and use the add-in are as follows:
1. Download and install the STK Excel Add-in
You can download it from the
downloads page, on the AGI tab under Data and Auxiliary Extensions. Simply run the installer. It will place the add-in file in the standard location specified by your Microsoft Office configuration. Typically, this is C:\Users\[Username]\AppData\Roaming\Microsoft\AddIns.
2. Configure Microsoft Excel
There are two configuration items that you will have to adjust to gain access to the add-in. You have to activate the new add-in, and you will need to enable the "Add-ins" tab on the Excel ribbon if you are not currently using Excel add-ins. If you are having issues setting these configuration items, please consult
Microsoft support for your version of Excel.
As an example, to activate the add-in for Excel 2016, click the
File tab, click
Options, and click the
Add-Ins category. At the bottom of the form select Excel Add-ins in the
Manage shortcut menu and press the
Go... button. You can then select the Excel Add-ins from the subsequent form.
To activate the Add-ins tab on the Excel ribbon, click the File tab, click Options, then click the Customize Ribbon category. Select the Add-ins check box in the Main Tabs selection list on the right of the panel.
3. Connect to STK and analyze
With the add-in activated, select the
Add-ins tab on the Excel ribbon.
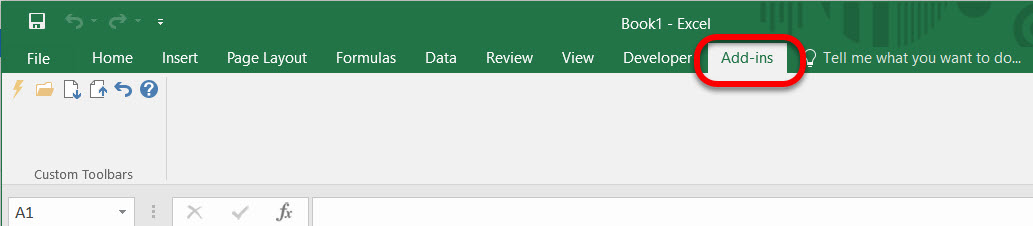
You will see the STK Excel Add-in toolbar, as illustrated below.
The download button produces a form that enables you to choose any of the simulation entities in the active STK scenario (e.g., ground vehicles, aircraft, sensors, radars, etc.) or access objects. It also enables you to select from their available data providers.
NOTE: When you download data, the add-in will use the active cell in your Excel worksheet as the starting location for the data download. Be careful not to overwrite data. If you do, you can use the "Undo" button on the toolbar to recover.
This
video, pictured below, illustrates the primary functions of the add-in.
