Step by Step Set up for HLA in DSim
- Install the MAK RTI.
- MAK has different installs for their RTI based on compiler. The version of the MAK RTI being run needs to match the compiler used for STK. For example, if you are running STK 11.1, which is compiled on Visual Studio 2012, you would need a version of the MAK RTI compiled on msvc++11.
- Start the MAK RTI before launching STK
- Start STK (this will be the receiving instance of STK) and create a new scenario named HLAReceive
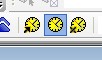
- Put STK in "Real time Mode" by clicking on the middle yellow icon of the animation toolbar:
- Open the RT3 Display Manager
- Select “High Level Architecture” and click the

 button. In the HLA configuration pop-up you must set several parameters
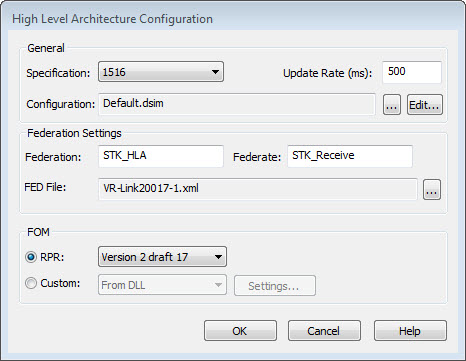
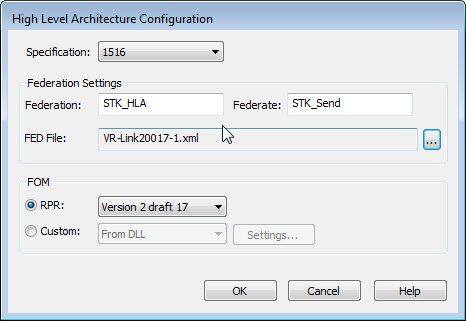
- Select the HLA specification you would like to use. In this example I’m using HLA 1516
- Enter a name for the Federation. I will use STK_HLA
- Enter a name for the federate. I will use STK_Receive
- Hit the browse, “…”, button. For HLA 1516 select VR-Link20017-1.xml, for HLA 1.3 select VR-Link20017-1.fed, for HLA Evolved select VR-Link20017-1_evolved.xml
- Ultimately, the configuration window should look something like this:
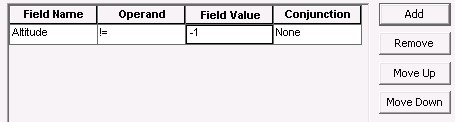
7. After pressing okay, create a query and use the below settings.

8. Select OK and save the scenario.
9. Start a second STK (this will be the output instance of STK) and create a new scenario named HLASend
10. If you are prompted with the panel below please choose the right RTI connection as shown below, not the loopback adapter one
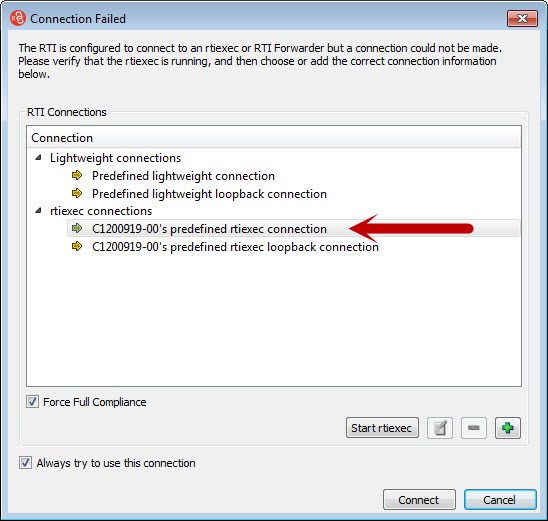

Once you chose the connection, click on the Start rtiexec button and then click on Connect button
11. Create and propagate a satellite
12. Put the sending STK in X-Realtime mode by clicking on the right yellow icon on the animation bar.


13. Open the RT3 Output window
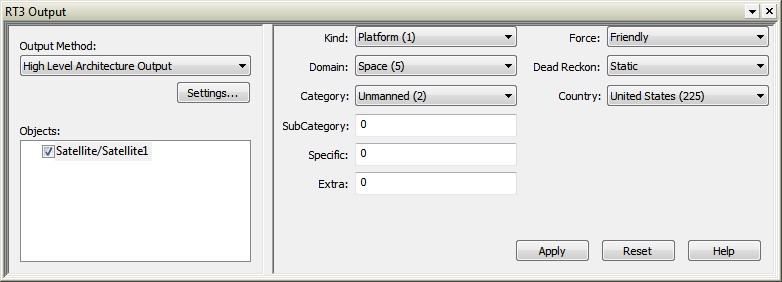
14. Select High Level Architecture Output and make sure all settings match exactly the same as they do in step 6. The only difference is that you should change the federate name to STK_Send. Here is what you should end up with:
15. Configure the satellite for output. The window should look like the below:

16. Press Apply and then save the scenario.
17. Animate the STK Send instance.
18. Animate the STK Receive instance
19. Start the RT3 HLA provider on the STK Receive instance by checking the checkbox next to it as
shown below:
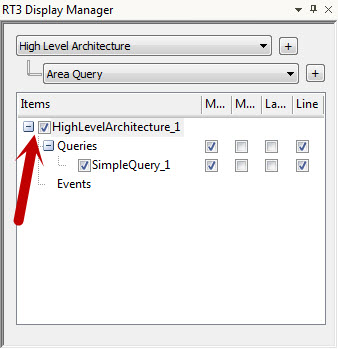

You should now see the satellite appear in your HLASend scenario.

