Sentinel-2 is an Earth observation satellite program operated by the European Space Agency that provides optical imagery for scientific purposes. The satellites Sentinel-2A and Sentinel-2B operate in a sun-synchronous orbit that ensures consistent revisit times and viewing geometries for high-quality images. These images cover the vast majority of Earth's land surface at resolutions as good as 10 m, and they are freely available to the general public. You can download these images from the Copernicus Open Access Hub for high-quality visualization within the Ansys Systems Tool Kit® (STK®) application. Doing this is especially useful when working in environments where Bing Maps and other internet streaming sources are not readily available. This example demonstrates how to import Sentinel-2 data into the STK application for offline visualization.
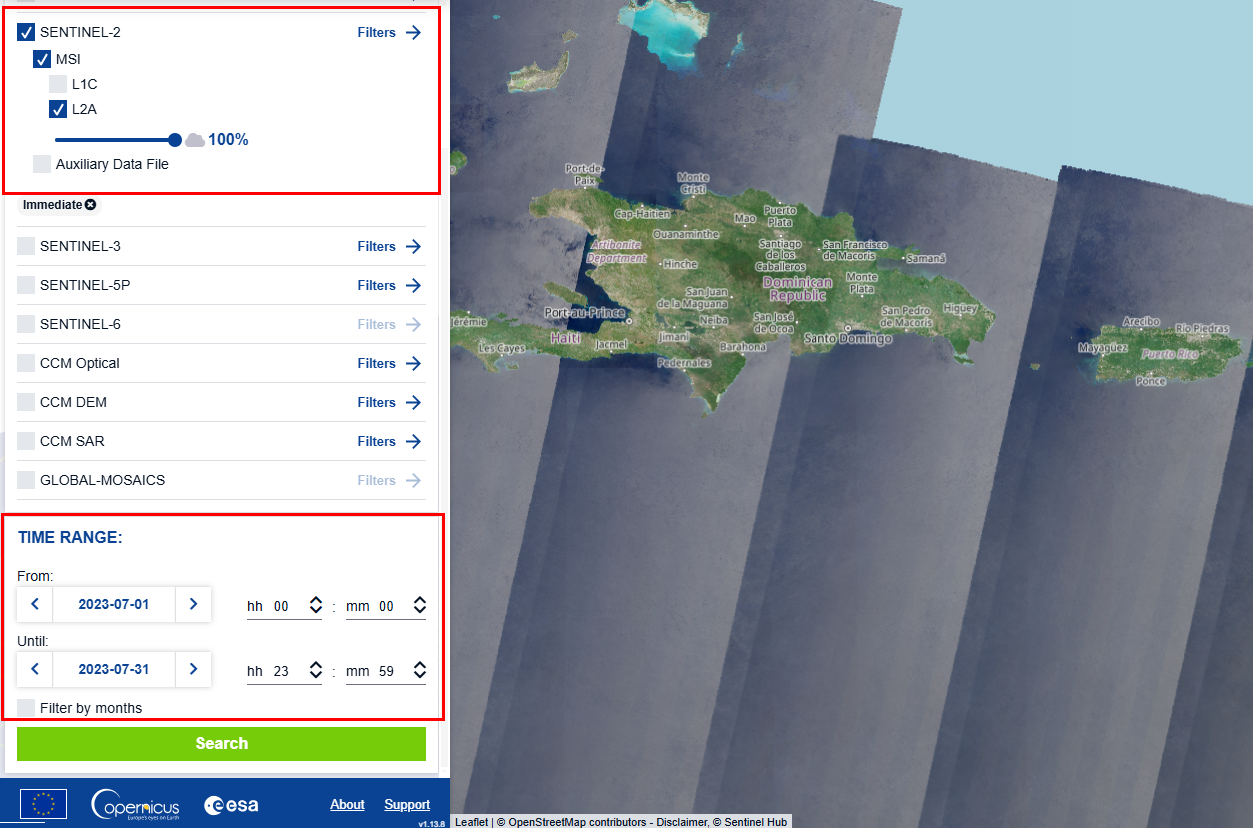
- Visit the Copernicus Browser and create an account. On the left side of the screen, select the Search tab. In the search bar filter, check the Sentinel-2 mission and select the L2A checkbox. You can also specify a (maximum) cloud cover percentage. Depending on the region, this may significantly limit search results if you set the cloud cover percentage too low. The product type stands for Sentinel-2 Multispectral Imager, Level 2A, which is a processed image that includes scene classification and atmospheric correction in cartographic geometry and is considered as the mission's Analysis Ready Data. Next, search for Puerto Rico in the upper-right corner to navigate to the US territory. Then, change the date range of the search to last from 2023-07-01 to 2023-07-31 and click Search.
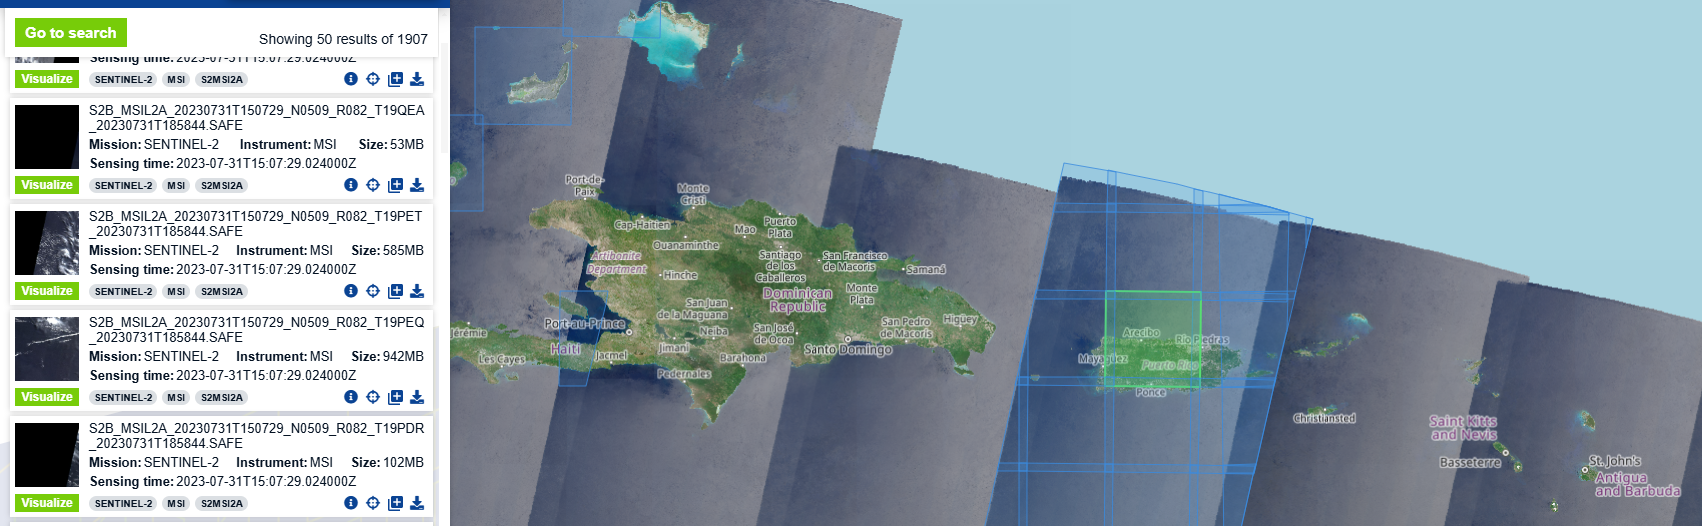
- Hover over the each search result to view the tile in the map view. Click the Download icon at the bottom right of each search result to save the desired tiles. This can be one or more tiles of data, and it is okay if they overlap. Once downloaded, unzip each folder and go to the directory GRANULE\L2A...\IMG_DATA\R10m. This directory contains JP2 imagery in each sensor band. Look for the TCI imagery, or True Color Image. The TCI is an RGB image formed from the B02 (Blue), B03 (Green), and B04 (red) bands. Surface reflectance is coded between 1 and 255, with 0 being reserved for No Data. Check out the Sentinel-2 Products Specification Document for more detailed information.
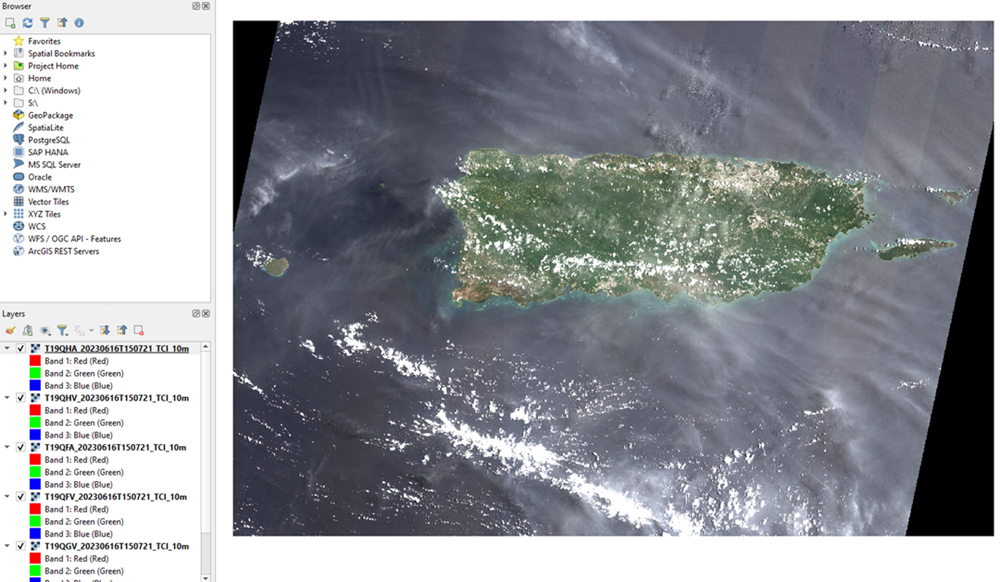
- You can now combine the images into a single image ready for import. You can use QGIS, a popular free software tool, to accomplish this. Click and drag each TCI JP2 file from each downloaded data directory into QGIS. Move layers up and down as needed to ensure that the image is visible. In this example, six TCI files were imported.
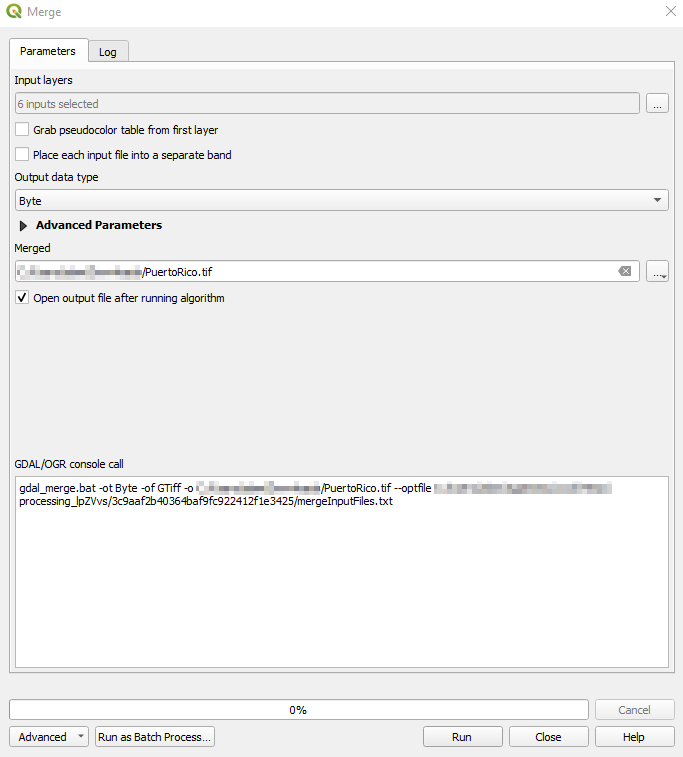
- Now, merge all the layers into one cohesive image. Go to the top toolbar and select Raster -> Miscellaneous -> Merge. In the parameters tab, select all input layers, set the Output data type to Byte, and save the merged file to an output directory of your choice. Click Run. Be patient, as this may take some time.
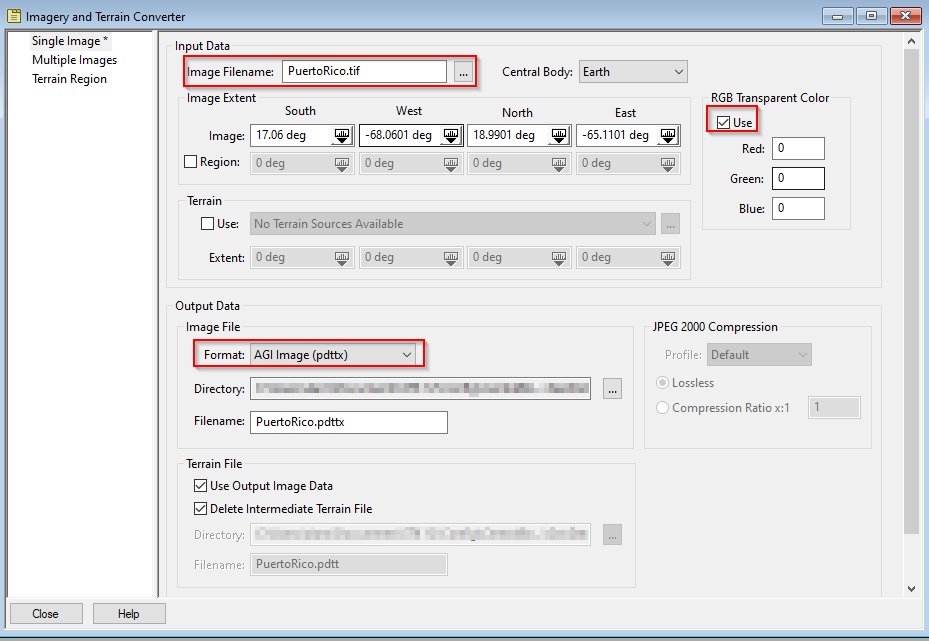
- You now have a single image that you can edit using the STK Imagery and Imagery Converter to remove the any black sections with no data and to convert the image format to STK PDTTX format so that it is compatible with the 3D Graphics window display capability. Open the STK application and select Utilities -> Imagery and Terrain Converter. Ensure that Single Image is selected on the left. Set the image filename to the output from QGIS and notice that the image extents automatically populate. Select the Use check box in the RGB Transparent Color section to convert any black No Data pixels to transparent. Finally, set the Image File Format to AGI Image (pdttx). Click Convert. Be patient; this may take a moment.
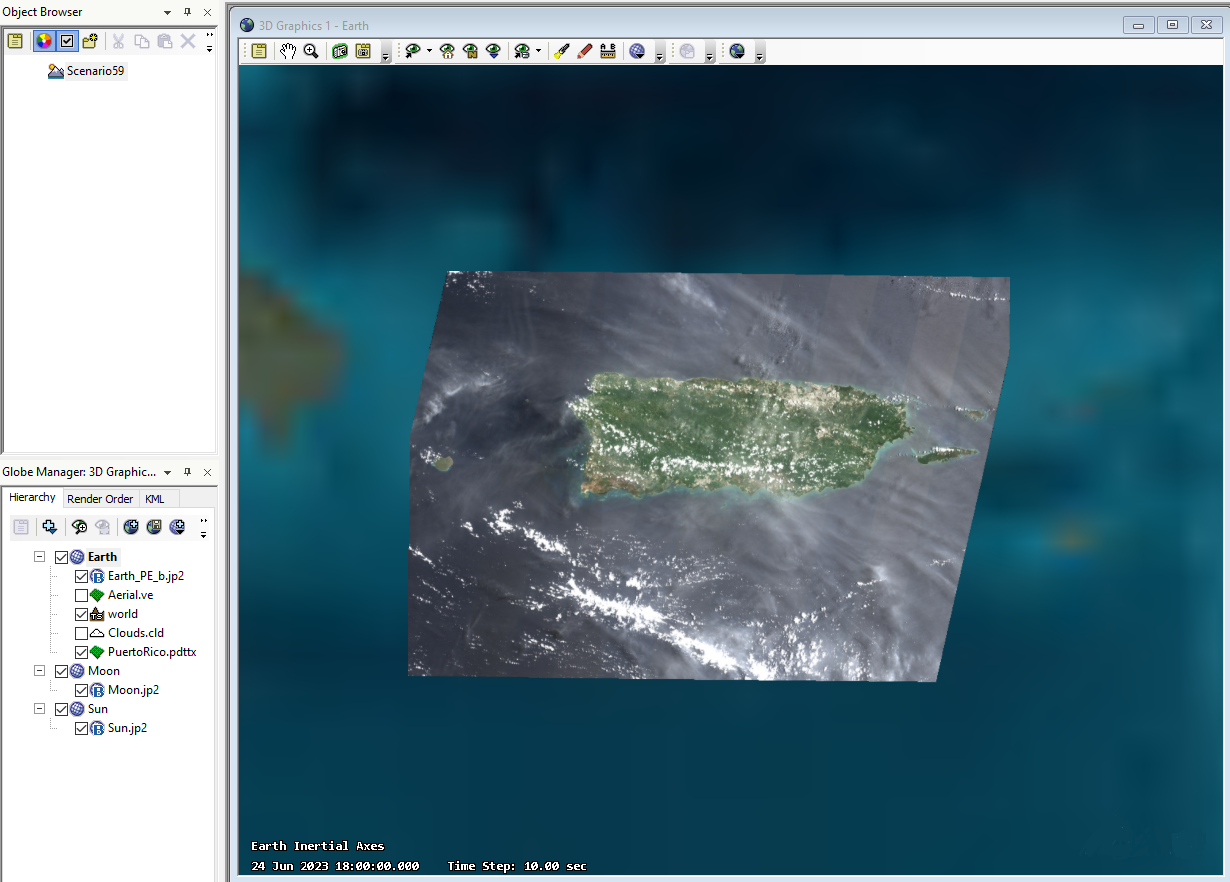
- Once complete, open the Globe Manager from the 3D Graphics window toolbar. With Earth selected, click the blue plus sign to Add Terrain/Imagery and go to the saved PDTTX file. Add it to your scenario and enjoy the high-resolution imagery!
Want cloudless imagery? Global and cloudless Sentinel-2 data by EOX is commercially available, and you can import it through the same process. Looking to enhance your STK analysis even more? You can import public domain terrain data by following the instructions in How to Import SRTM Terrain from NASA's Earthdata into STK.

