This article looks at two simple reasons why a Collada model may not be displaying properly in the Ansys Systems Tool Kit® (STK®) digital missions engineering software and provides a guided step-by-step walkthrough to fix these potential issues using Blender, a free and open-source 3D-modeling suite. If you do not have Blender, you can install it for free at https://www.blender.org/. The steps outlined below were created using Blender 2.80.
Note: There may be other issues causing the problem with your Collada model. If the following steps do not address your issue, please send an email to our support team at support@agi.com and, if possible, please include your model file.
Blender setup: importing your Collada model file
1) Open the Blender application.
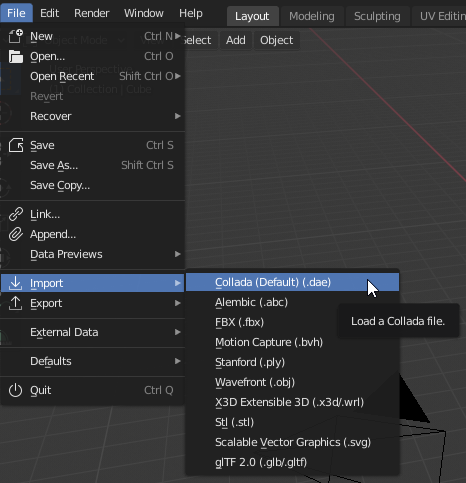
2) Select File from the main toolbar, hover over Import, and select Collada (Default) (.dae).
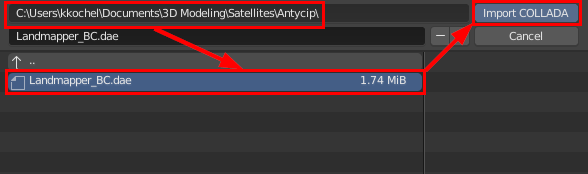
3) At the top of the window, browse to the file path where your model is located. Select your model file and then click the blue Import COLLADA button in the upper right.
4) After the model is imported, you will first want to delete the default cube that is placed at the origin of the window. Left-click the grey cube and hit the Delete key to remove it. You should be left with only your model file in view. In the upper-right corner you will see a hierarchy of all the components of your model.
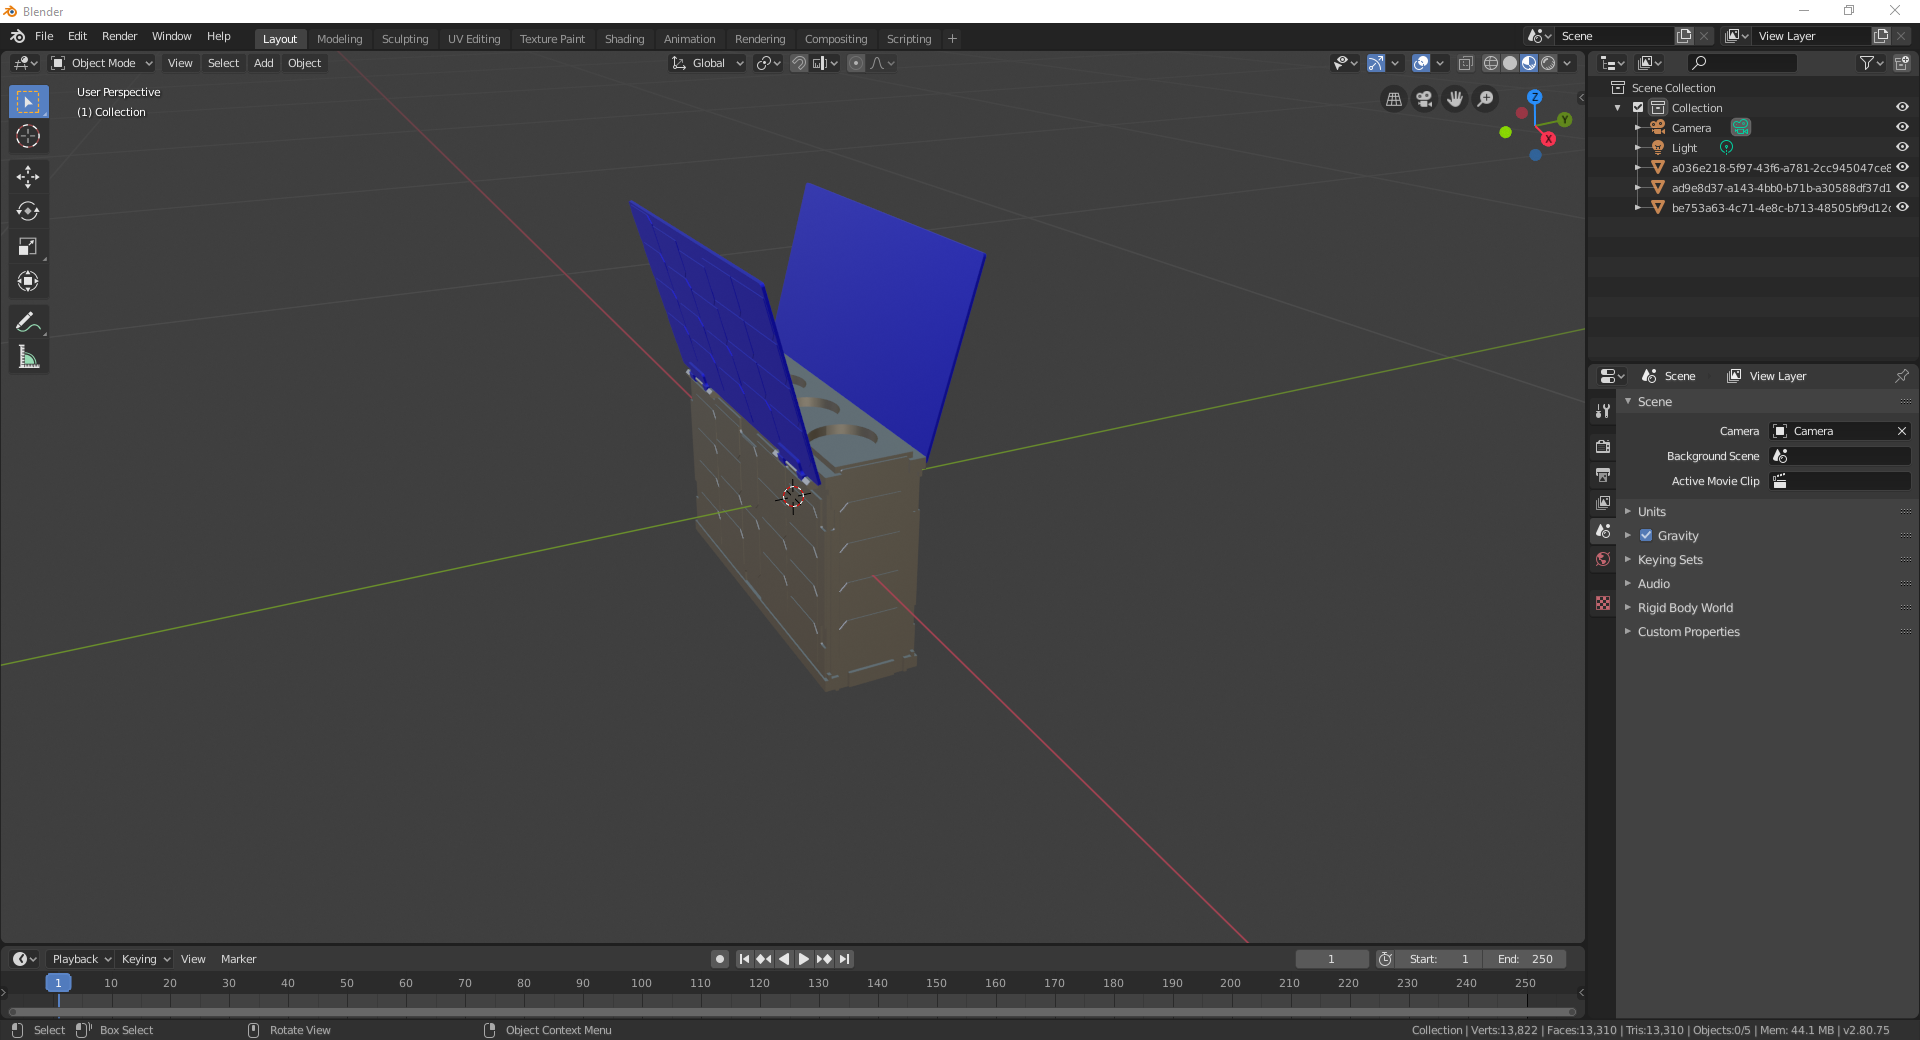
Issue #1: The scaling of any or all components in the model file are not equal to 1.
When the STK application reads in a model file, it looks at the scaling value for the model and multiplies the model's dimensions by this scaling value. If the scaling value is quite small or quite large, it will quickly cause an issue when loading. To avoid this possibility, you should always set the scaling value to 1 for each and every component of the model. Continuing from the sample satellite above, here are the steps:
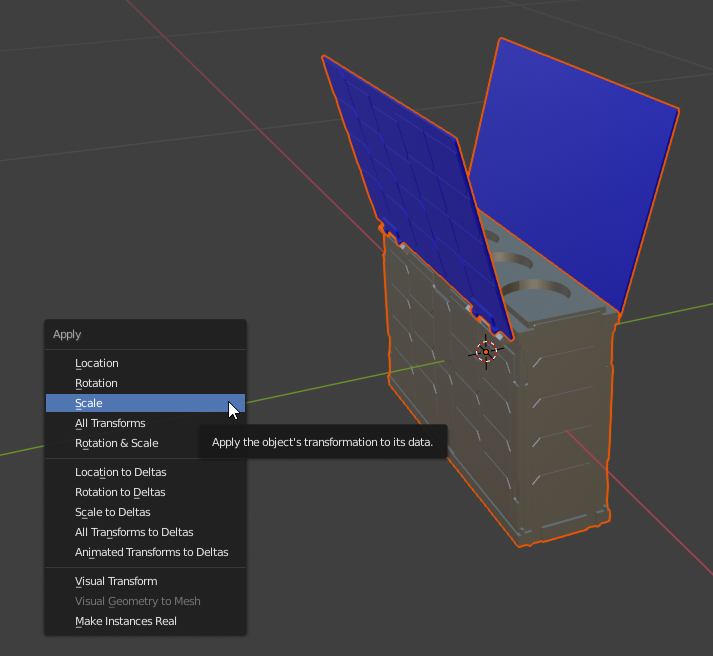
1) Hover your cursor over the main view window and hit the "A" key. This will select all of the components of your model. You should see an orange outline around each component in the main view window.

2) With all components selected, hover over the main view window again and hit "CTRL + A". Click Scale from this pop-up menu. This will set the Scale value equal to 1 for each component.
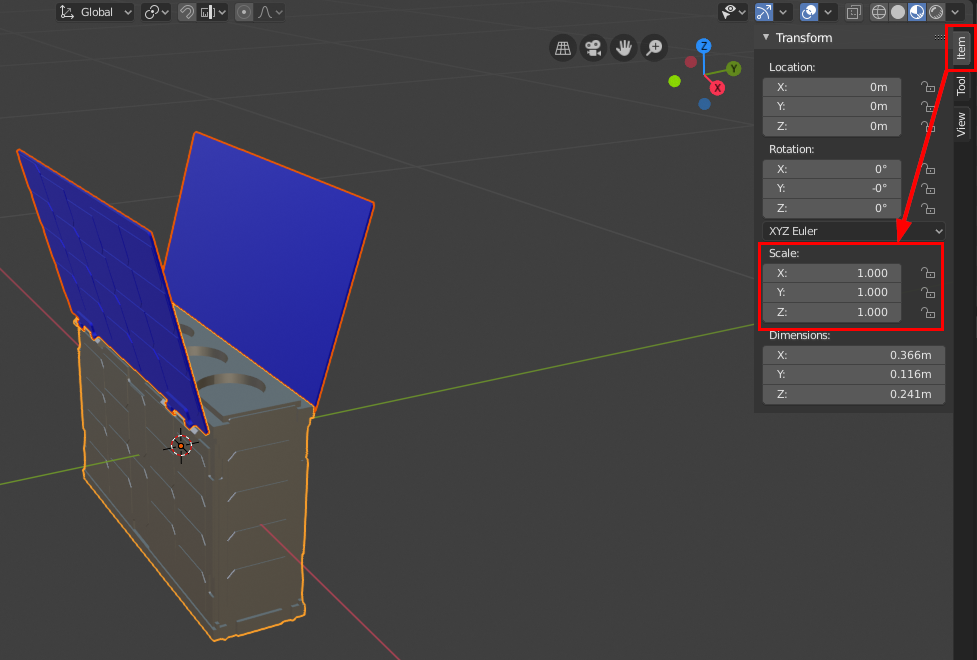
3) To verify the scale value has been set to 1, hover over the main view window again and hit the "N" key. This will bring up a window on the right side of the main view window. Select the Item tab and observe the scale values.
Issue #2: The Base Color for any or all components may have an Alpha value < 1.
Each component of your model likely has a material applied to it. Each material will have a Base Color associated with it, of which there is a property called Alpha that acts as a translucency setting. If this value is set to 0, then the model will be invisible when you load it into the STK application. Continuing from our sample satellite above, here are the steps to address this potential issue:
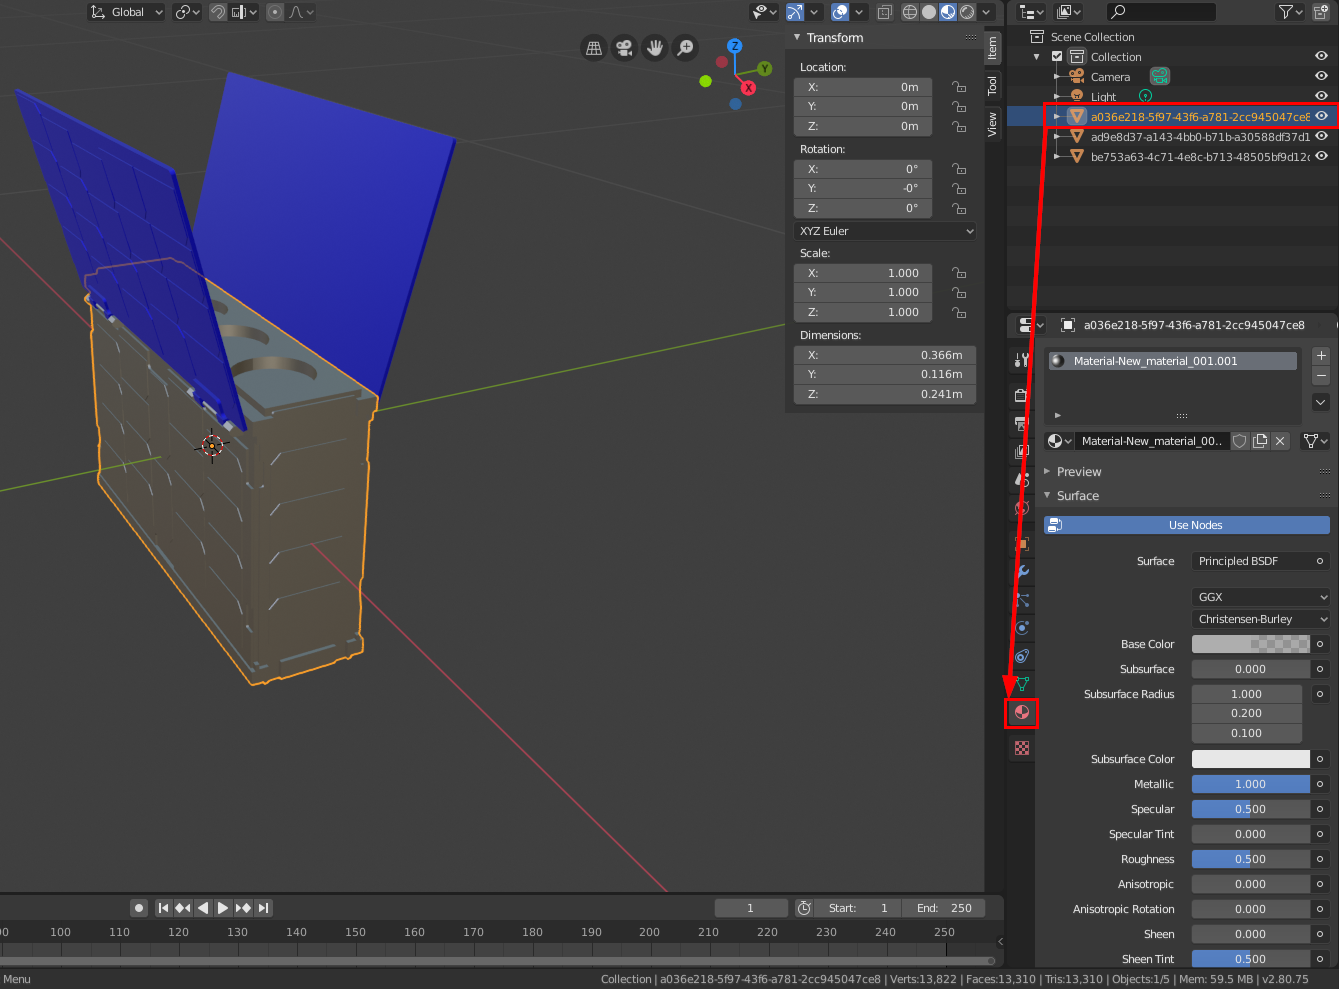
1) You will have to select each component individually in this case. You can either select a component by left-clicking it in the main view window or by clicking it in the hierarchy window in the upper right. Start by clicking one of your components. Then, select the Materials tab near the bottom of the colored vertical icons below the hierarchy window.
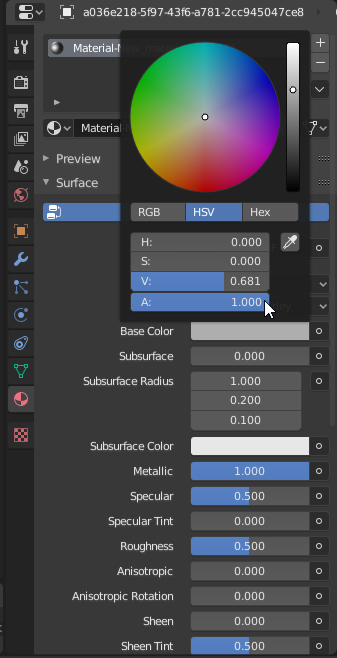
2) Note how the colored bar next to Base Color looks. You can already see that this has an Alpha value < 1, since the bar is not completely colored. Click this colored bar to bring up another small window. In this case, the Alpha value is set to 0. You can change this by either clicking Alpha and dragging to the right or by clicking and then entering a value of 1. For Blender 3.0 and later, you can also change the alpha value by directly changing the Alpha slider found a few steps beneath the Base Color setting.

3) Once Alpha equals 1, you will see that the colored bar next to Base Color is now completely colored.
4) Repeat the steps above to set the Base Color Alpha value to 1 for each component of your model.
Exporting the Model
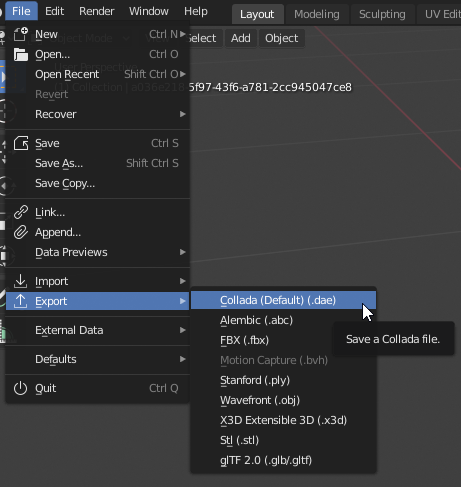
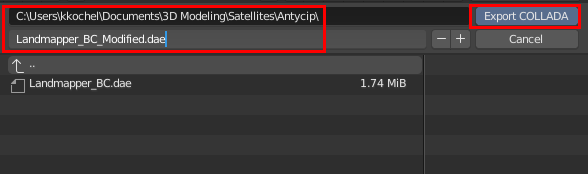
1) After modifications are complete, select File from the main toolbar, hover over Export, and click Collada (Default) (.dae).
2) Browse to the file path where you'd like to save your file, assign the file a unique name, and then click the blue Export COLLADA button.
3) Return to the STK application and load in your model to see if it now displays properly.

