The majority of 3D models found within the
Support Center do not have solar panel groups set, meaning that you cannot use them within the Solar Panel Tool. The Solar Panel Tool requires that solar panel groups be set within the 3D model in order to report and graph the generated power, area, and angles for a specified time frame. This article shows you how to use Ansys Discovery software to define solar panel groups and efficiencies, and it describes how to import the resulting DSCO files into the STK application's Solar Panel Tool.
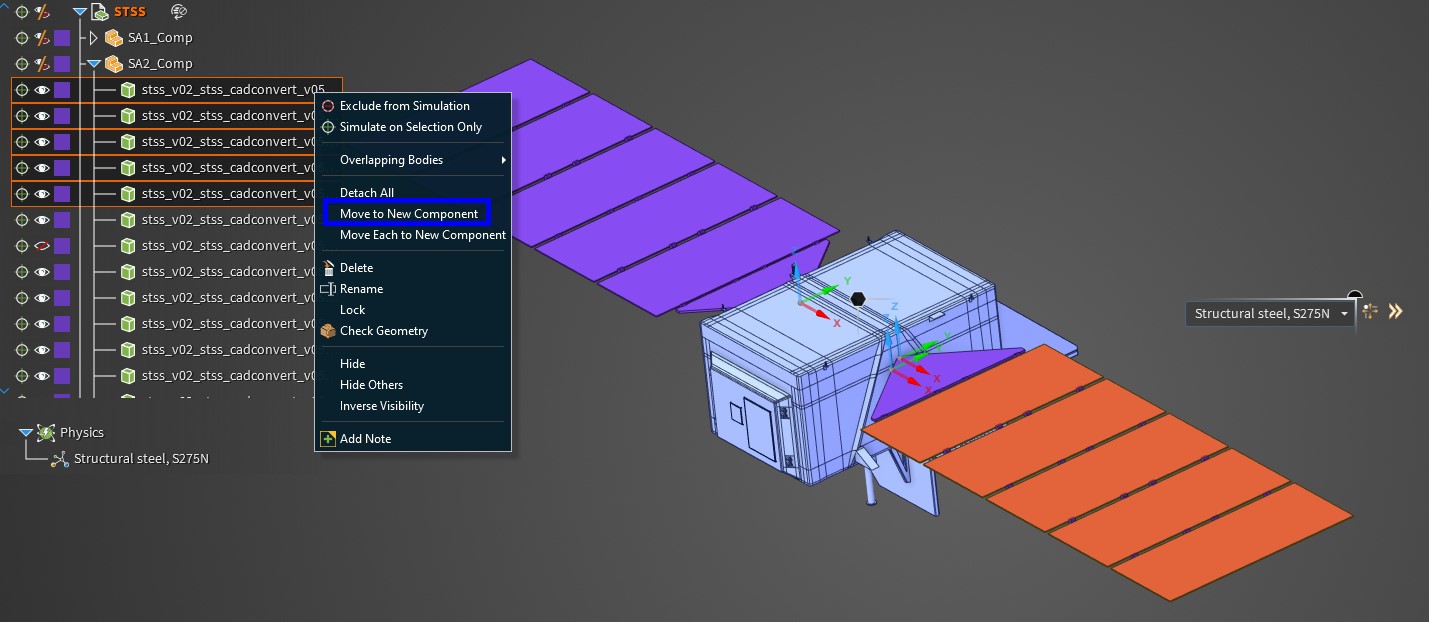
Creating a new component for the Solar Panel groupTo set a solar panel group in the Discovery software, you must include the desired solar panels within the same Discovery application component. However, the solar panels may already be set within a component that has other objects for the model included. You must move the solar panels to a separate component in order to set the solar panel groups.
1. Hold CTRL and select the desired solar panels within the Component Browser on the left.
2. Right-click the selected solar panels and click "Move to New Component."
3. Rename the solar panel group.
 Creating a component of one surface
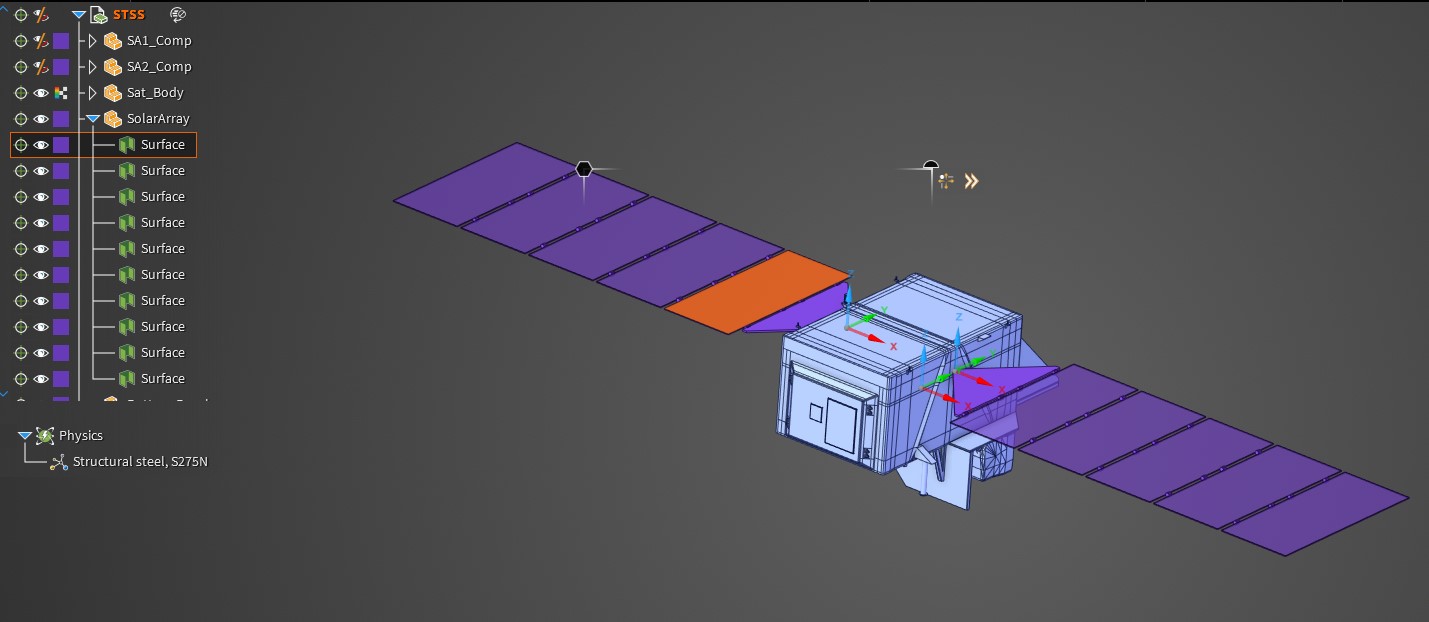
You can only simulate the solar panels with solar cells on one surface. Do this by detaching the top face of the enclosed objects that are set as the solar panels. You can then select the top surfaces of the solar panels for the new component to create the solar panel group.
1. Hold CTRL and select the desired solar panel faces within the GUI of the model.
2. Right-click in the open space on the GUI and select Detach to separate the selected faces from their enclosed solar panel object.
3. Once they are detached, hold CTRL and select all the desired Surface objects for those solar panels within the Component Browser.
4. Right-click the selected solar panel surfaces and click "Move to New Component."
5. Rename the solar panel group.
 Set the solar panel groups and efficiencies
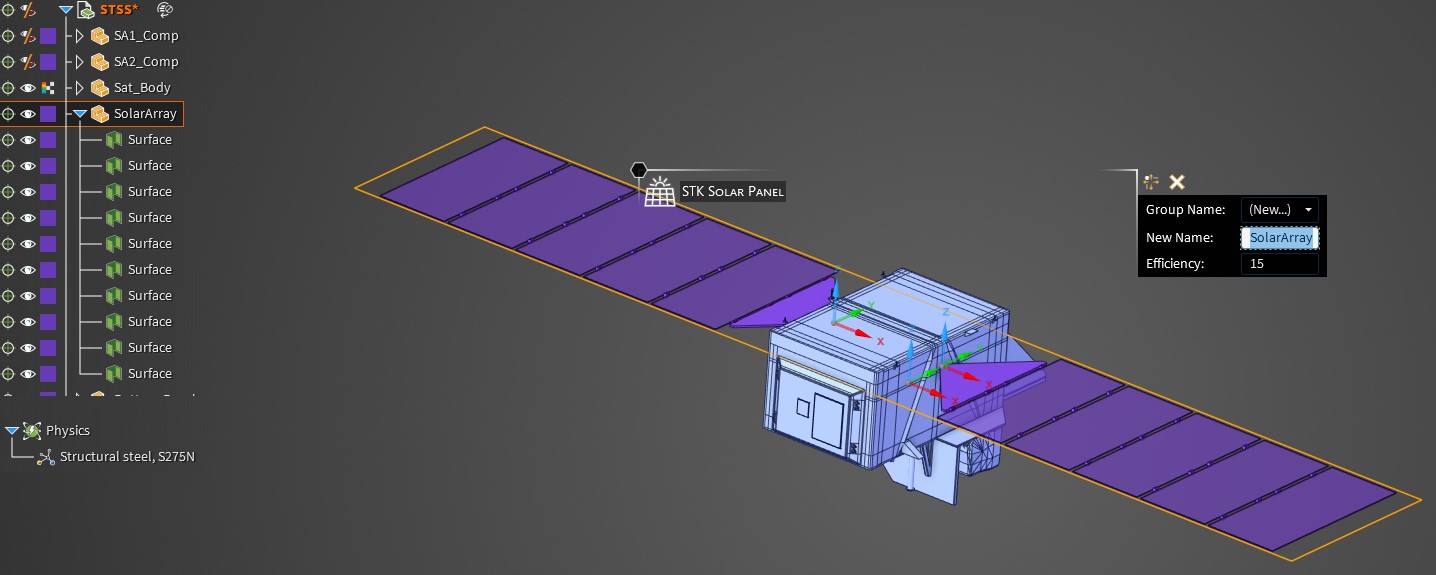
You can set the solar panel groups and efficiencies in the Discovery UI using the Systems Tool Kit (STK) tab.
1. Select the Solar Panels button under the Systems Tool Kit (STK) tab.
2. Select the Component with the desired solar panels or solar panel surfaces for the solar panel group.
3. Within the heads-up display, set the Group Name to "New".
4. Rename the solar panel group and set the desired efficiency.
 Exporting the model from Discovery and importing it into the STK application
Once the solar panel groups and efficiencies are set, you can export the 3D model in a glTF (*.glb) format. Exporting models from the Discovery application occurs through that format, since it is suitable to import into the STK application.
Discovery application1. Select the
Export a glTF (*.glb) model for STK button in the top left of the Systems Tool Kit (STK) tab.
2. Within the dialog box, rename the file and go to the desired location for saving it.
3. Select Save in the menu to save this file to your location.
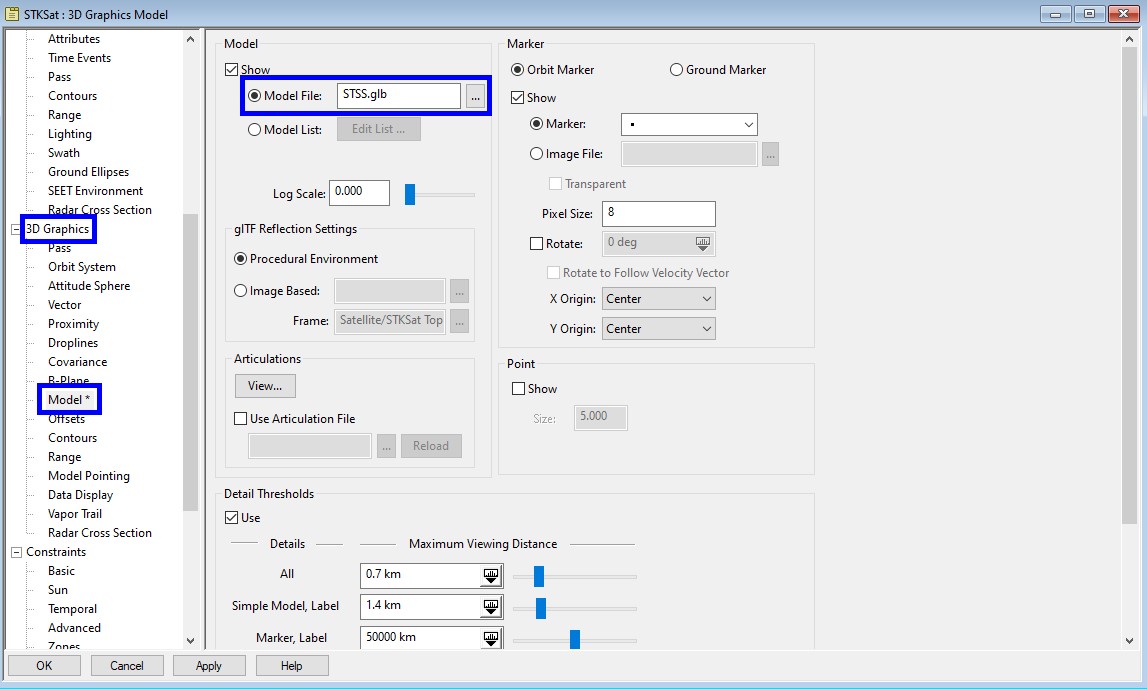
Systems Tool Kit (STK) application1. Within an STK application scenario, click the Insert Object icon, which is located in the Default toolbar.
2. Insert a Satellite object using the Define Properties method.
3. Within the properties, go to the 3D Graphics – Model page.
4. Set the Model File as the exported GLB file from the Discovery application.
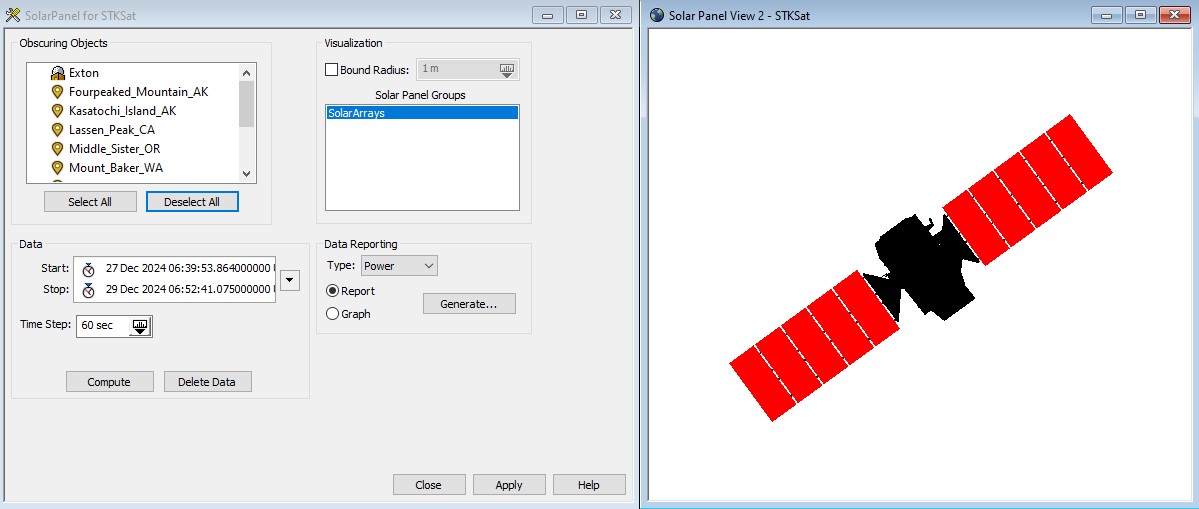
 Solar Panel Tool
Within the Solar Panel Tool, you can now see and use the solar panel groups that you set in the Discovery application.
1. Right-click the Satellite object in the Object Browser and select Satellite.
2. Select Solar Panel to open the tool.
3. Select the desired Solar Panel Group(s), Obscuring Objects, Time Interval, and Time Step.
4. Click the Compute button.
5. Once the tool has collected the data, the Satellite model will stop rotating.
6. Under Data Reporting, select the Type of data along with the desired format.
7. Click Generate.
 Applying the Discovery-application-to-STK-application workflow to a docking scenario
Using the same general approach as defined above, you can configure a docking scenario in the STK application and study the effects of obscuration on power generation. Following the steps in the video linked below, you will use the STK plugin for the Discovery application to configure solar arrays on a Cygnus model then simulate a scenario in the STK application where the satellite docks with the International Space Station (ISS). Power generated by the solar panels is computed for the docking scenario. During docking, the STK application Solar Panel Tool takes Sun obscuration from the ISS as well as the satellite body into account to estimate power generated by the solar arrays.
Video for configuring solar arrays on Cygnus model