STK enables you to create elliptical Area Targets by specifying semimajor and semiminor axis distance dimensions. Although you can add coordinates to create other shapes, like rectangles, there isn't an option to specify a rectangular area target
using distance dimensions. Here is a step-by-step tutorial on how to create a rectangular area target anywhere on Earth.
- Insert an Area Target using the Insert STK Objects tool with the Define Properties method.
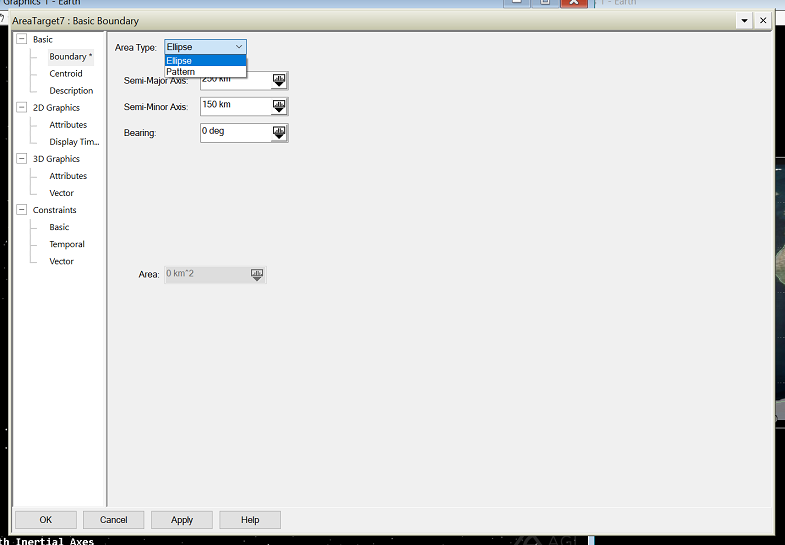
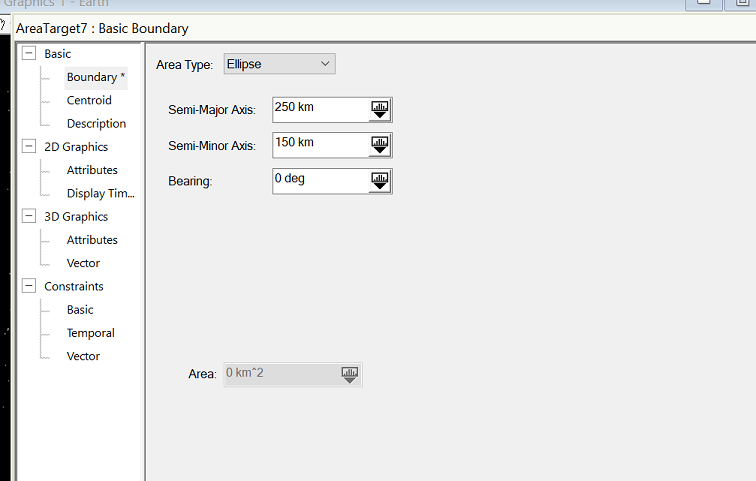
- In the Area Target’s Properties window, select the Basic – Boundary tab and change the Area Type to Ellipse.
- Change the Semi-Major Axis and Semi-Minor Axis to half of the length/width, respectively, of the desired rectangular area. For example, if you want a 500 km by 300 km rectangle, you would set parameters as follows:
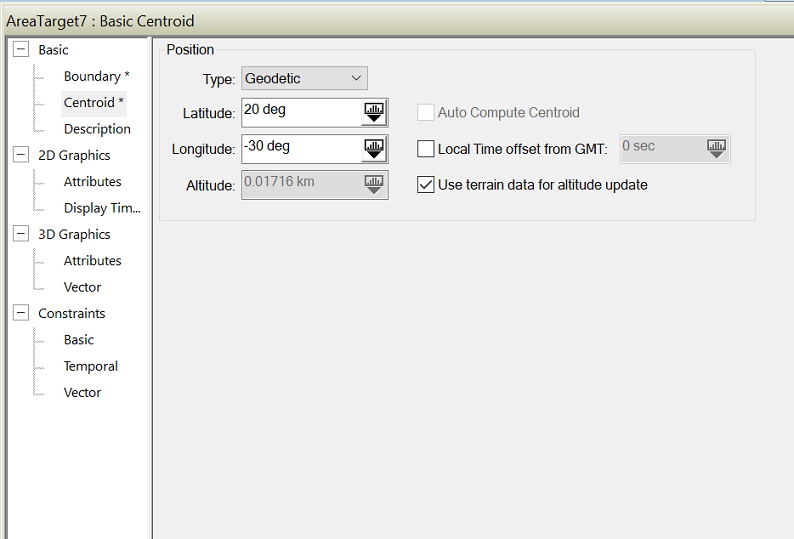
- Select the Basic – Centroid tab and enter the desired centroid location of the rectangular Area Target. Then click OK to close the Area Target’s Properties page and apply all changes.
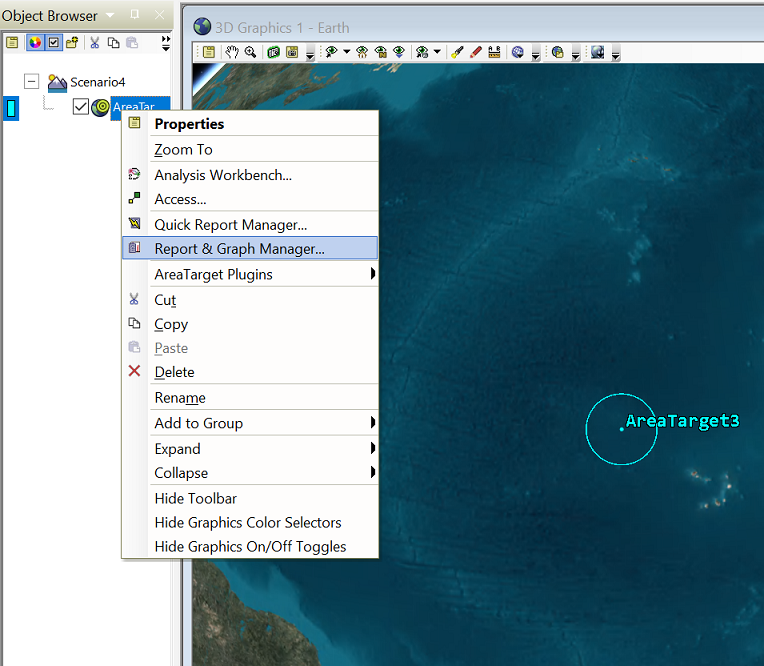
- In the Object Browser, right-click the Area Target and select the Report & Graph Manager.
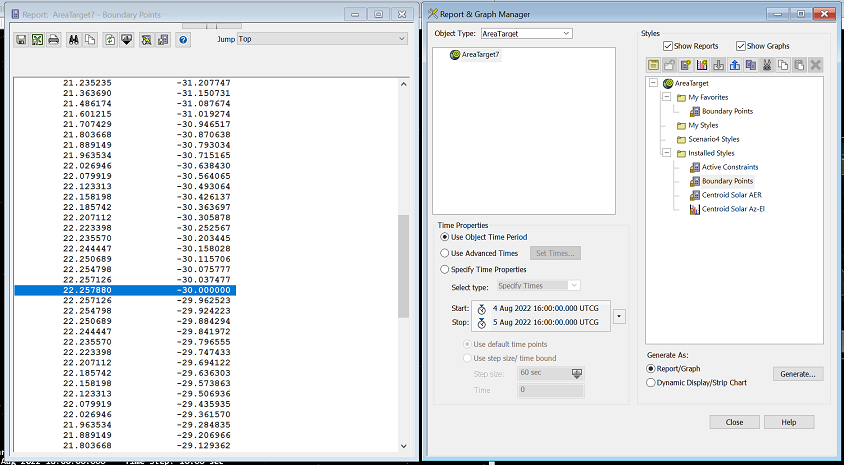
- Double-click the Boundary Points report in the Installed Styles folder on the right. On the left, locate the extreme (minimum and maximum) latitude and longitude points. Copy or write down these values for later use.
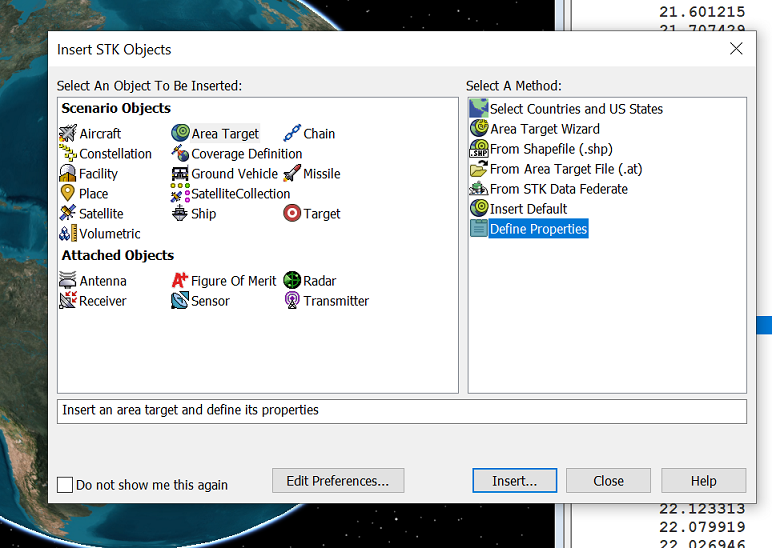
- Insert a new Area Target using the Insert STK Objects tool with the Define Properties method.
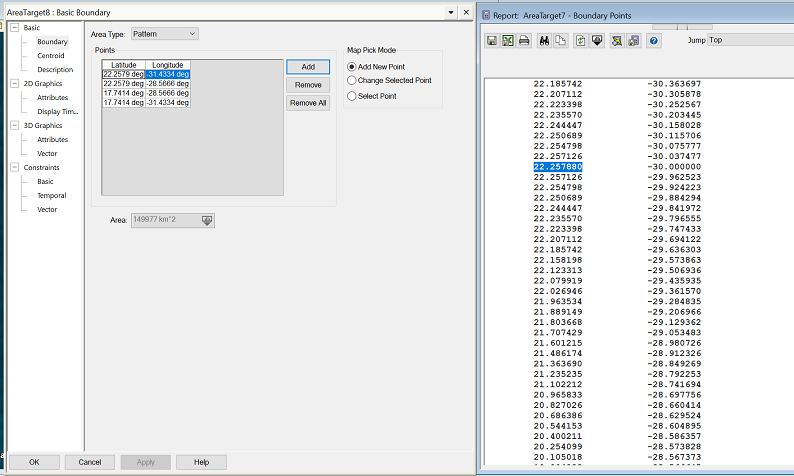
- Select the Basic – Boundary page and set Area Type to Pattern.
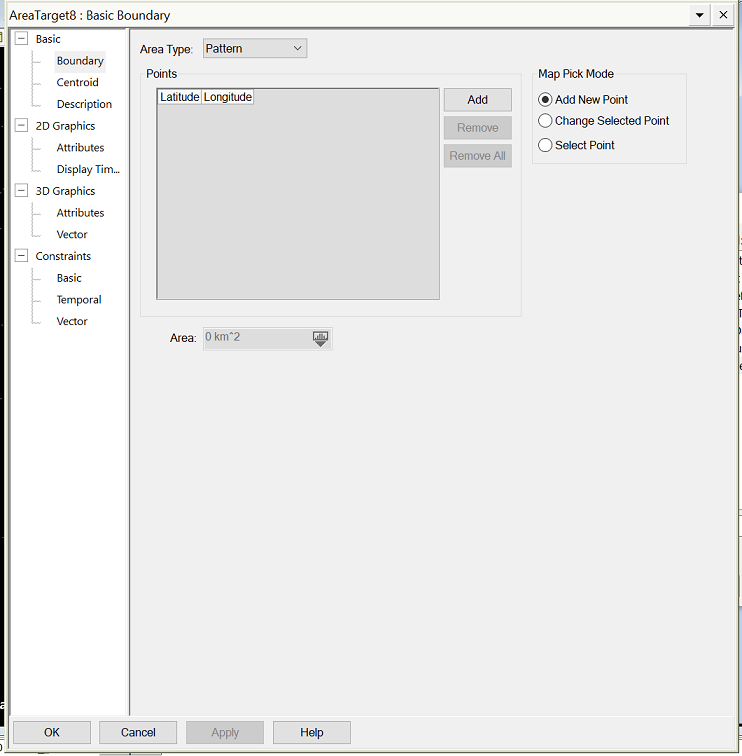
- Enter points as follows, using data from the Boundary Points report in step 6:
- [Max] Lat + [Max] Lon
- [Max] Lat + [Min] Lon
- [Min] Lat + [Min] Lon
- [Min] Lat + [Max] Lon
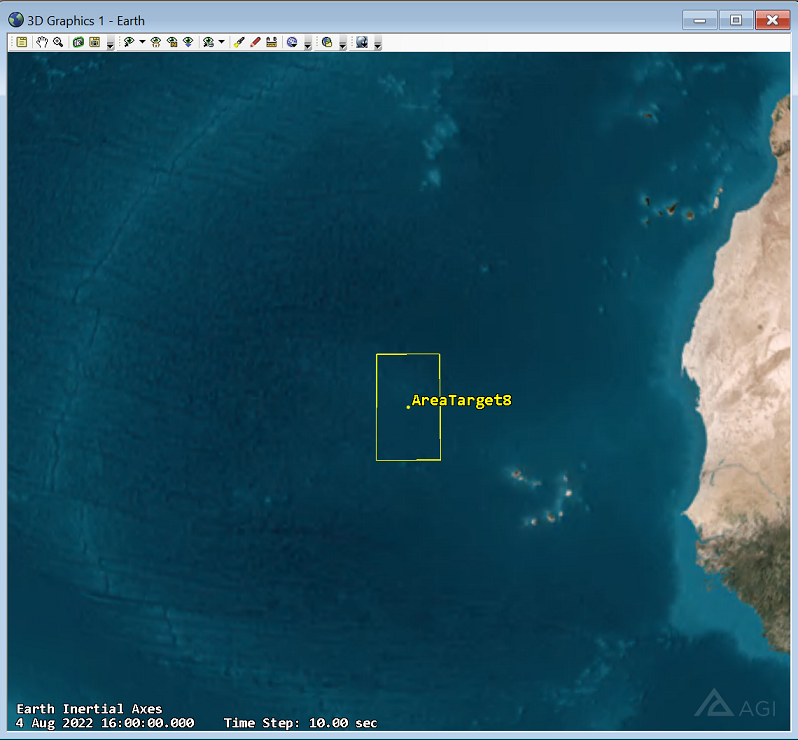
- Click the OK button to close the Area Target’s Properties window and apply the changes. Finally, delete the initial elliptical Area Target, and what’s left is the desired rectangular area target.